NORWEIGAN BROWN BREAD
In Norway, the most common bread types are made from oats, rye, barley, and wheat. Norwegians love their traditional, healthy, and nutritious "everyday bread," filled with grains that have sustained generations. Among these cherished bread varieties, Norwegian brown bread, stands out as a testament to the country's deep appreciation for wholesome ingredients and time-honored baking traditions.
1. BOIL & SOAK THE GRAINS
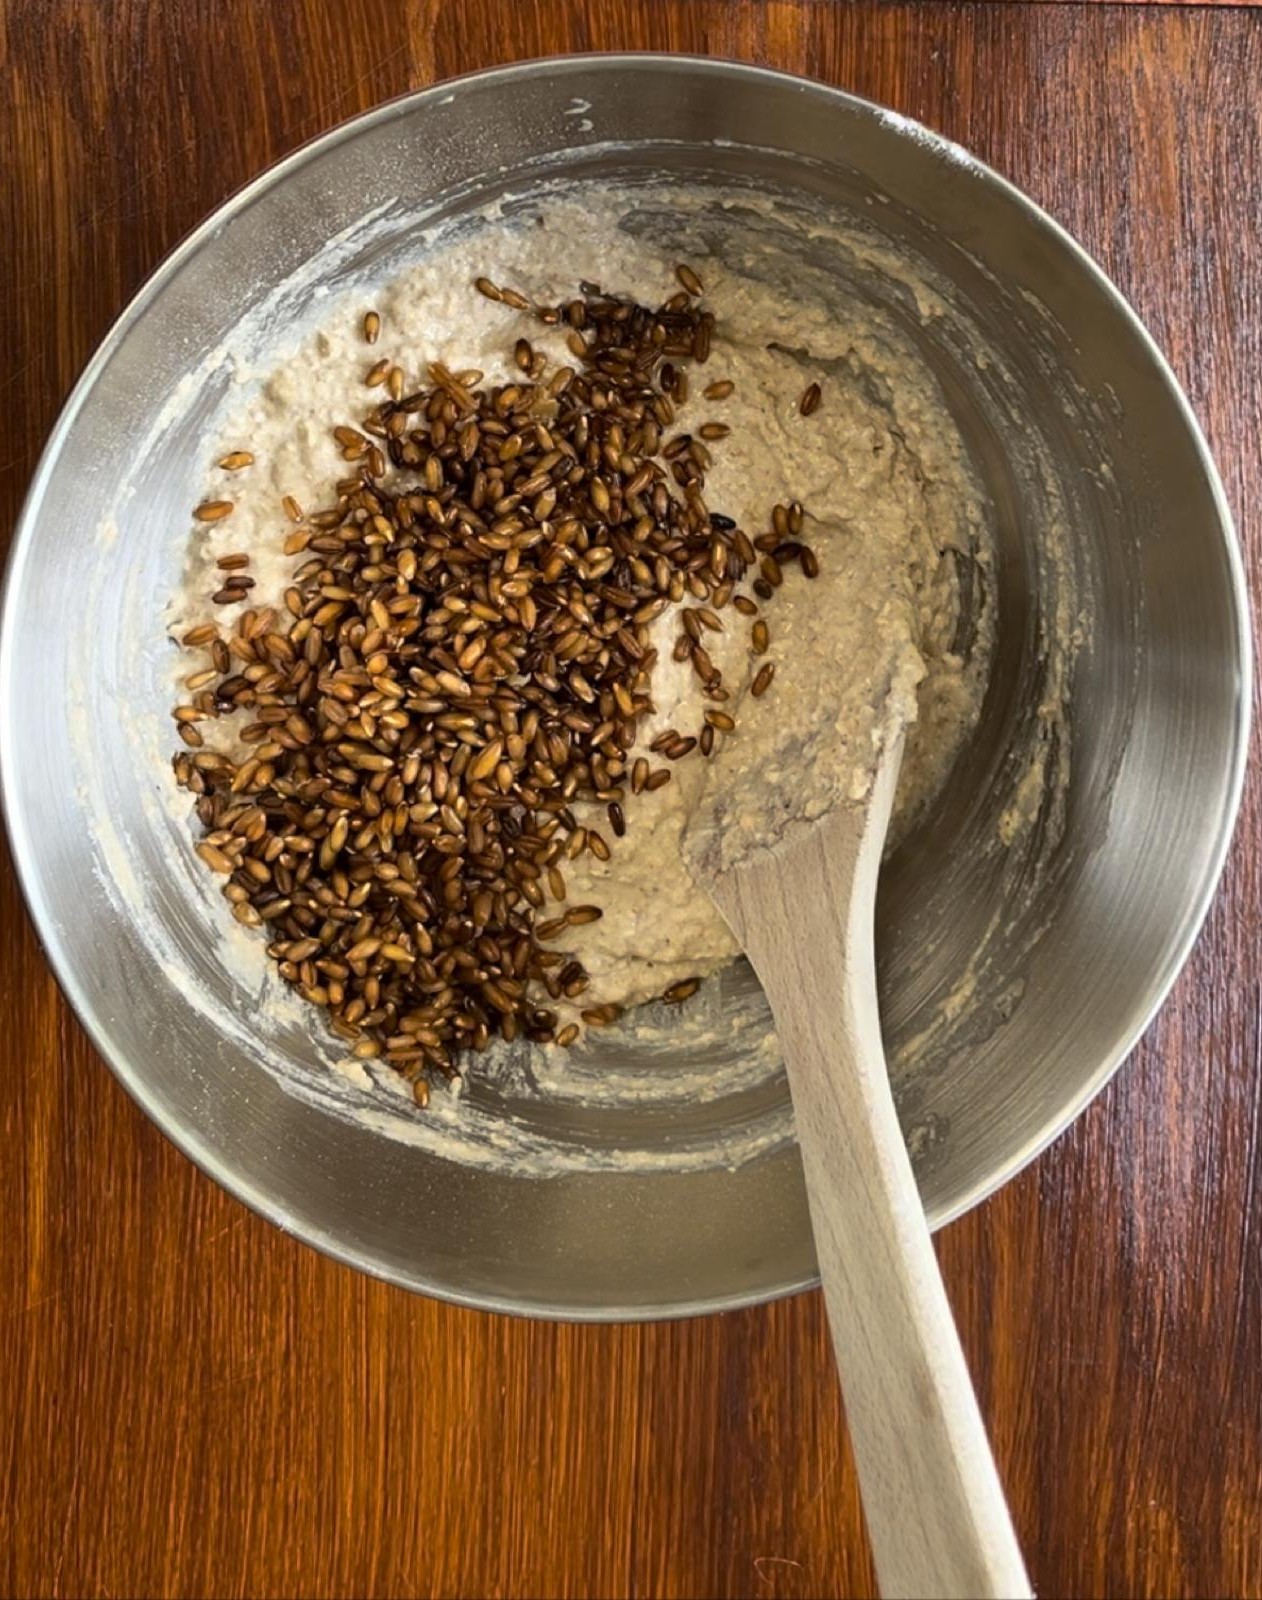
Pour grains from bag h in a medium size bowl and pour 350ml of water on them and leave them to soak. Then pour the rye berries from bag g, in a saucepan and cover with 400ml water and bring to a boil. Boil the rye berries for 25 min, then remove them from the heat and drain them and mix them with the soaked grains. This boiling process is intended to render the rye berries softer and more easily digestible, enhancing both their texture and digestibility.

2.MIX THE INGREDIENTS
Begin by heating up 350ml of milk to room temperature, then pour the yeast from bag a in a large bowl and pour the milk over and stirr. Next, incorporate the grain mixture and blend in the flour mix from bag i.
3. KNEAD THE DOUGH
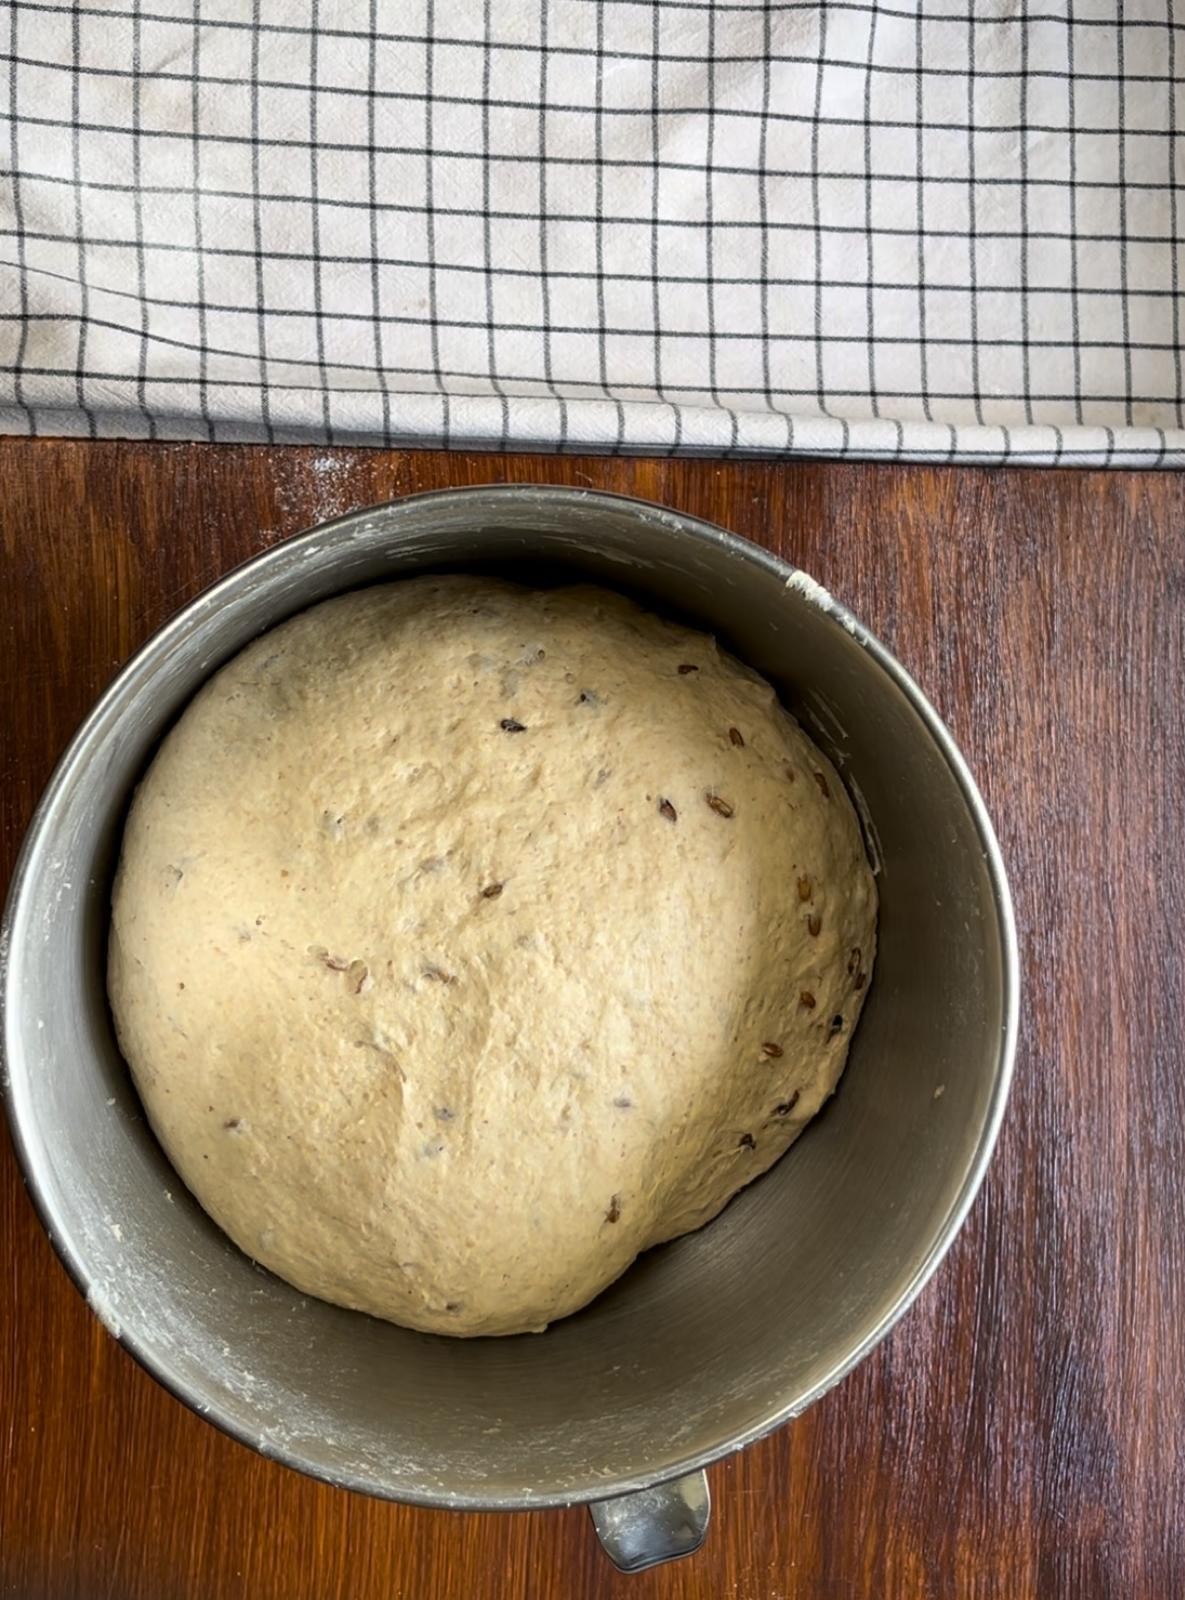
Knead the dough using a mixer or by hand for 5min, The dough should be sticky, if you are kneading by hand, dip your hands in some water to prevent it from sticking to your hands. Shape the dough into a round ball, place it back in the bowl and cover with a tea towel. Let the dough rest for 30min, then knead the dough for another 2min. Then let it rest for 20min.
To make sure that the dough has gotten the right consistency and that the gluten strands have been developed, do a gluten test. Take a small portion of the dough and gently stretch it. The dough should show elasticity, and be able to be stretched thin. It should handle some pulling without breaking. If the dough breaks straight away, it means it needs some further kneading.


4. DIVDE DOUGH IN TWO
Divide the dough into two equal portions. Roll each part in to a ball. Flatten the balls into rectangles, about 20 centimeters in length and 2.5 centimeters thick.
Next, roll the dough into a loaf shape, by grabbingone short end and rolling it up. Then pinch the seam together securely.


5. LET THE LOAVES REST & RISE
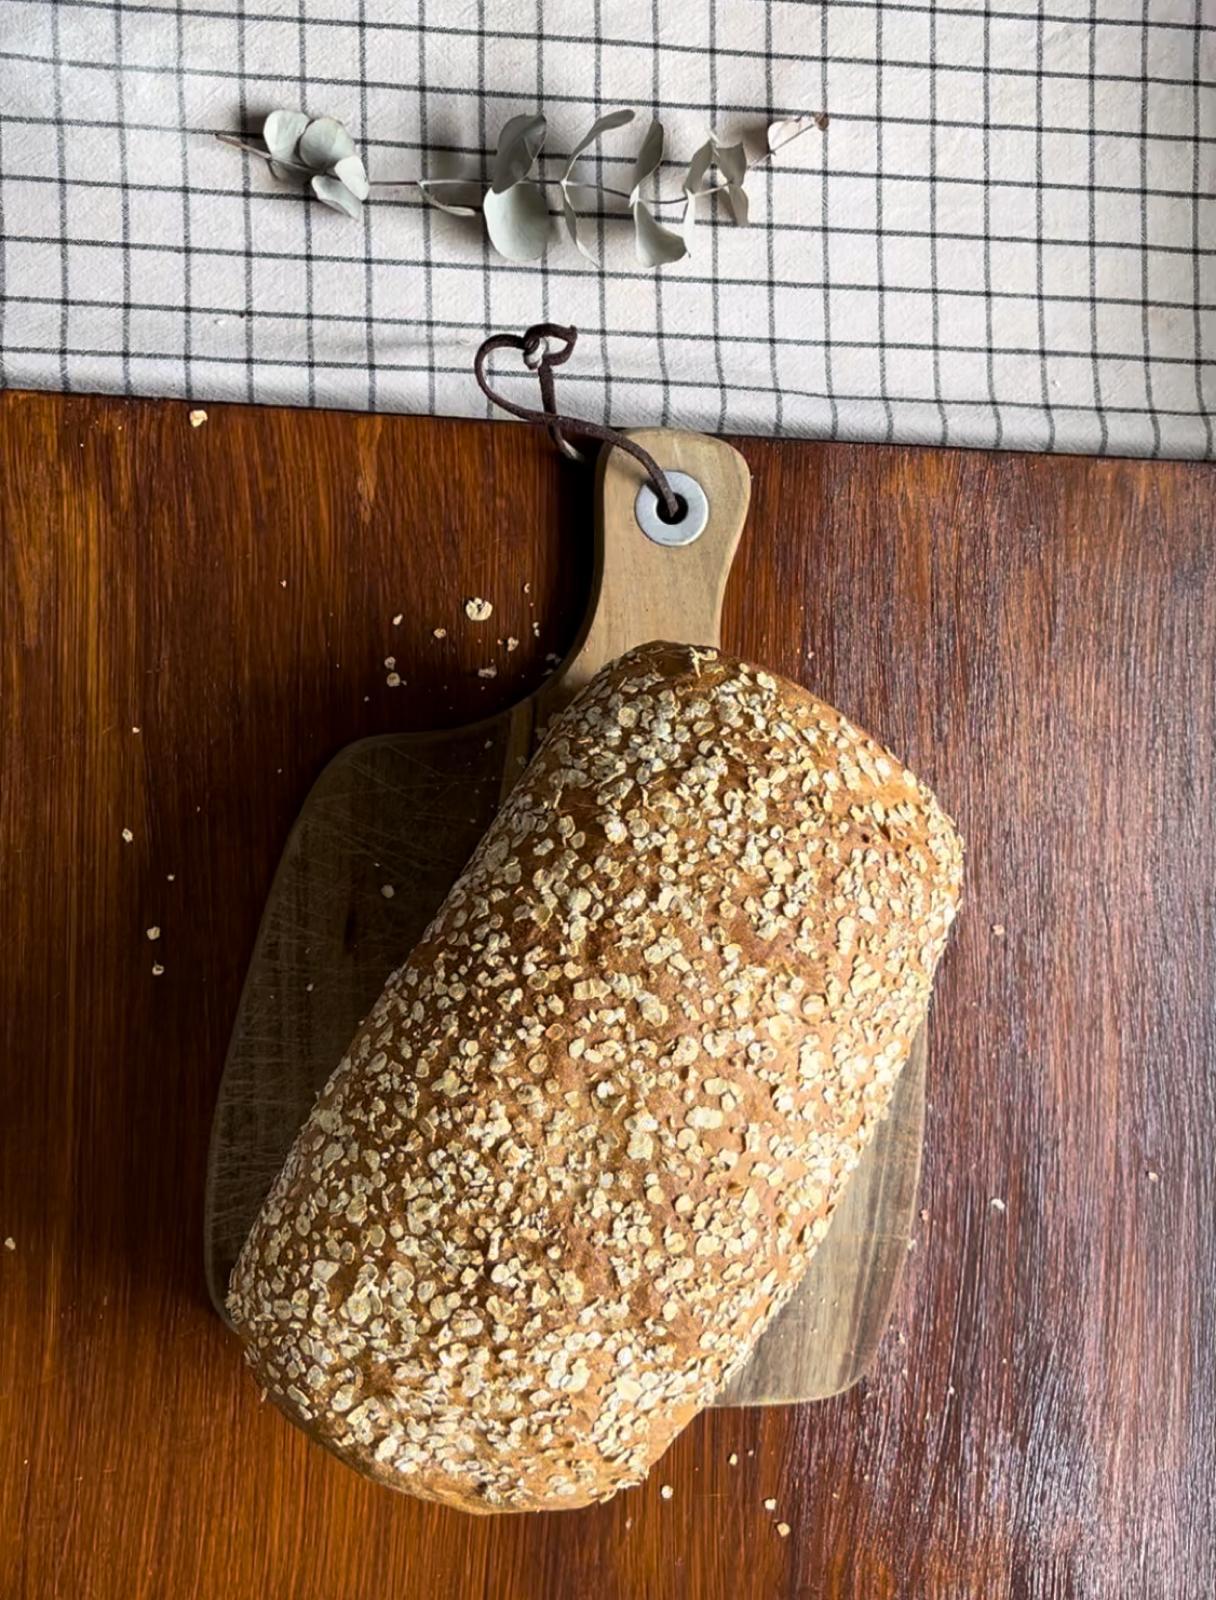
Brush the top of each loaf with milk (seam should be at the bottom) and dip them in oats from bag j.
Place the loaves into two loaf pans covered with parchment paper or, if you don’t have loaf pans, onto a parchment paper-lined baking tray. Cover the loaves with a clean tea towel and allow them to rise in a warm spot for approximately 40 minutes.

6. IF IT IS A COLD DAY
Put the loaves in a cold oven, then place a cup of boiling water in the bottom of the oven and close the oven. This creates a little steam room for your loaves and will make them rise faster.


7. BAKE YOUR BREAD
Preheat the oven to 190°C if fan forced oven and 210°C for a conventional oven. Bake the bread in the lower part of the oven until golden brown, approximately 30min. Remove the bread from the loaf pans and
leave them to cool on a cooling rack. Enjoy!


8. IS THE BREAD DONE?
The loaves should reach an internal temperature of 98°C when they are fully baked. In case you lack a thermometer to gauge the bread's inner temperature, a simple alternative is to gently tap the bottom of the loaves. If they emit a hollow sound, it indicates they are ready. Once the loaves have completed baking, allow them to cool on a designated cooling rack before proceeding to cut them. Now, savor the delight of your freshly baked bread!